


 Share
Share Tweet
Tweet Share
Share


Posit Connect (formerly RStudio Connect) is a platform that simplifies the deployment of data science and analytics content for R and Python applications, such as Shiny apps, Plumber APIs, Flask APIs, R Markdown documents, and much more. It simplifies sharing your applications, models, data, packages and reports with your team in the organization. It also allows you to schedule your streamlined process for automated reports and data pipelines. There are many examples of use cases of Posit Connect.
Ready to witness the brilliance of Shiny? Dive into our demo gallery for an immersive experience that will leave you inspired and informed.
Since Posit Connect allows for a vast amount of applications to be deployed and hosted, we will show in this detailed guide how to efficiently deploy your applications on Posit Connect using different interfaces:
- Using RStudio IDE
- Using Python Jupyter
- Directly from the terminal/script for R and Python applications
Table of Contents
Connecting our IDE to Posit Connect
Before we start showcasing how to deploy on Posit Connect, it is necessary to connect the IDE/environment to Posit Connect:
RStudio IDE
In order to connect on Posit connect from RStudio IDE, you must:
- Click on Tools and select Global options from the header menu.
Step 1
- Click on the Publishing tab and select “Connect…”.
Step 2
- Choose the option RStudio Connect.
Step 3
- Write the URL for your Posit Connect server.
Step 4
- Authorize your IDE to connect to Posit Connect.
Step 5
Now you’re able to publish to Posit Connect.
API Keys
For the remaining options of connecting to Posit Connect, you’ll require to have an API Key that is obtained from the Posit Connect Server:
- Log in to the Posit Connect Server.
- Click on your username and select API Keys.
- Create a new API Key
- Save the API Key in a safe location. This key will be shown only once!
- If you lose this API Key, just delete it and create a new one.
API Keys
Connect to Posit Connect using R
- To connect with the Posit Connect server using R, you must first save the API Key on your environment for safety.
usethis::edit_r_environ()
- It will prompt a
new .Renvironfile, for that you write the API Key.
CONNECT_SERVER = "your_Posit.connect.URL"
CONNECT_API_KEY = "yourapikey"
- Refresh the Rtudio instance
- After this, you have to install the package
rsconnect.
install.packages("rsconnect")
- After, you can run the following code with the proper information for the Posit Connect Server, your username account, and the API Key.
rsconnect::connectApiUser(
  server = Sys.getenv("CONNECT_SERVER"),
  account = "myusername",
  apiKey = Sys.getenv("CONNECT_API_KEY")
)
- Now you’re able to publish to Posit Connect.
Using Jupyter Notebook
To establish a connection using the Jupyter Notebook, firstly, you need to install the package rsconnect-jupyter for notebook extension:
- Installing in Python the package, the extension and enabling the extension.
pip install jupyter rsconnect-jupyter
jupyter nbextension install --sys-prefix --py rsconnect_jupyter
jupyter nbextension enable --sys-prefix --py rsconnect_jupyter
jupyter serverextension enable --sys-prefix --py rsconnect_jupyter
- Installing with Anaconda using a new environment
conda create --name rsconnect-jupyter
conda activate rsconnect-jupyter
conda install -c conda-forge jupyter rsconnect-jupyter
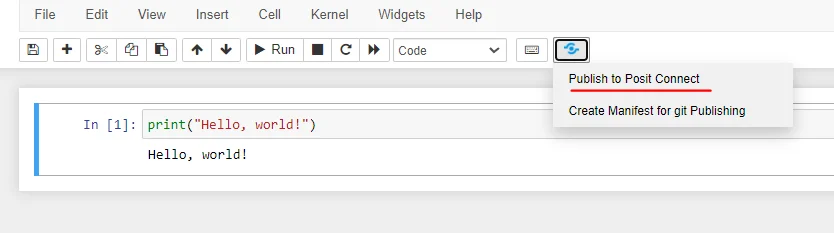
- After this, when you open the Jupyter Notebook, it will have the following icon:
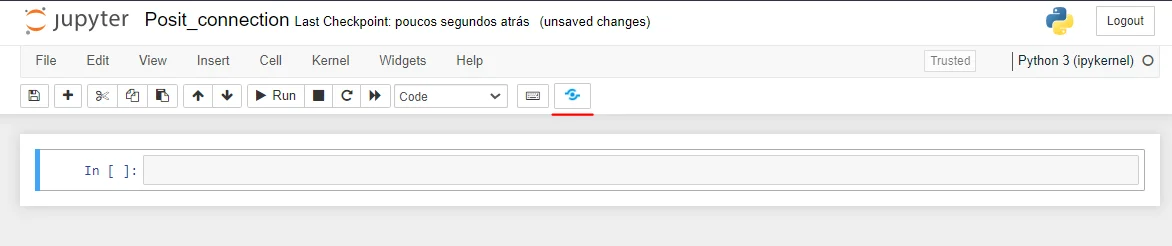
Jupyter Notebook
- To connect, click on the icon and select Publish to Posit Connect.
- Then set the information for the URL of Posit Connect server, the API Key and a nickname for the Posit Connect server for future reconnection.
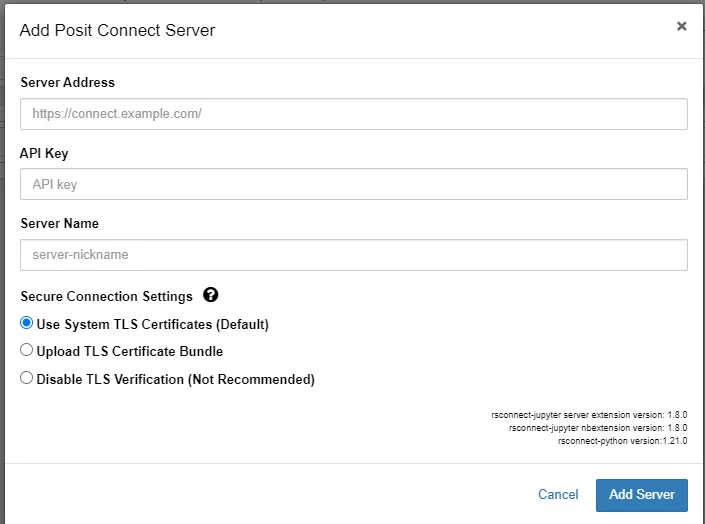
Add Posit Connect Server
It will then prompt a new window to publish the Jupyter Notebook; you can close it.
Now you’re able to publish to Posit Connect from a Jupyter Notebook.
Python Terminal
You can also connect using the Python terminal instead of the user interface of Jupyter Notebook.
rsconnect add \
    --server CONNECT_SERVER \
    --name server.nickname \
    --api-key CONNECT_API_KEY
Publishing Your Applications
Now that you have set your connection to Posit Connect, publishing different types of applications is possible. In this segment, we’ll illustrate how you can do it, and you’ll be given examples of some application’s publishing processes.
R & RStudio IDE
R Markdown/Quarto
The first example will be for an R Markdown file:
---
title: "Hello world"
output: html_document
params:
    name:
      label: "User name"
      input: text
      value: "username"
---

Hello, `r params$name`!
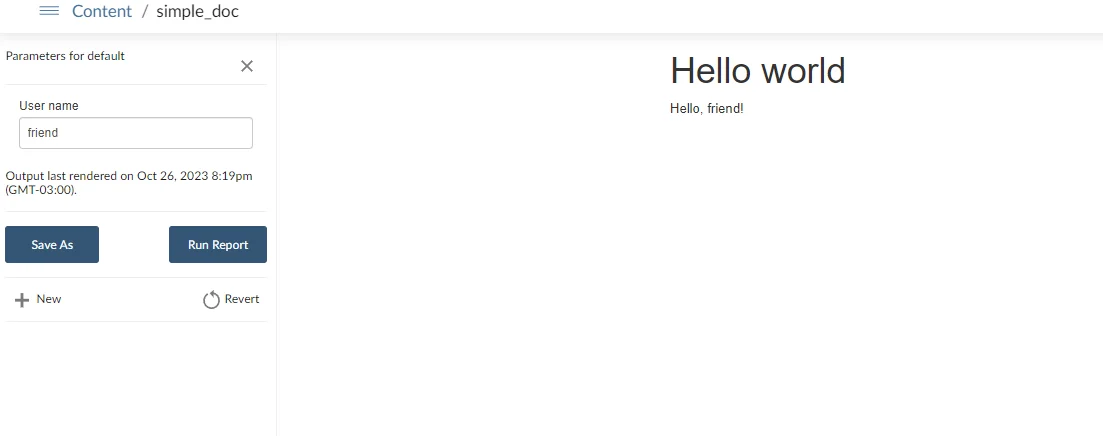
This code example shows that we’re using parameters. This is important to illustrate that Posit Connect can rerun documents from parameter inputs.
To deploy the document in RStudio Connect IDE, all we have to do is:
- Click on the publish button.
- Publish to the connection set for the Posit Connect server.
- Select publish document with server code.
- This is necessary if you want to change parameters or set a scheduled refresh.
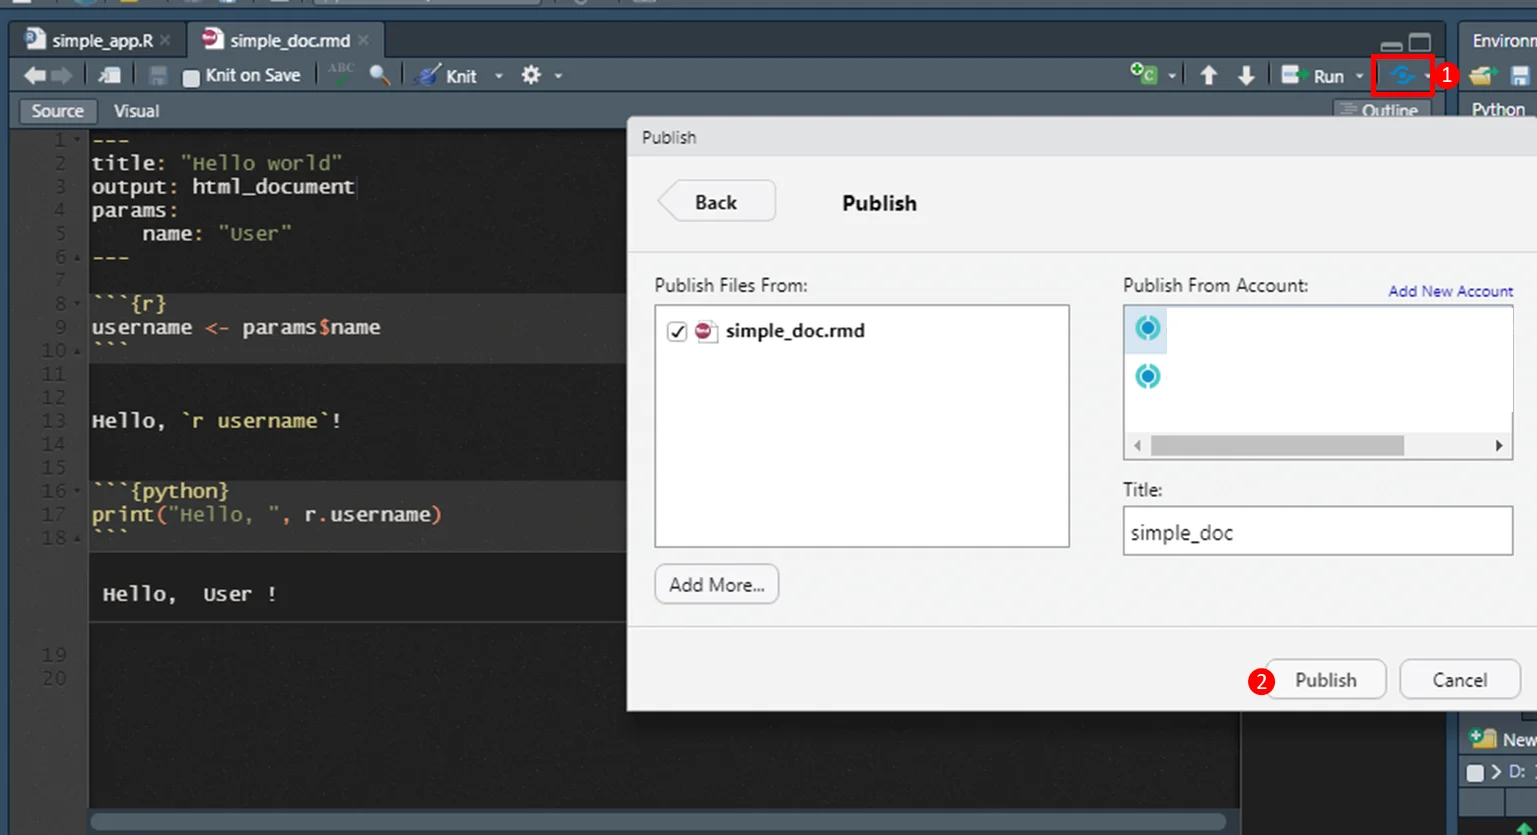
Click Publish
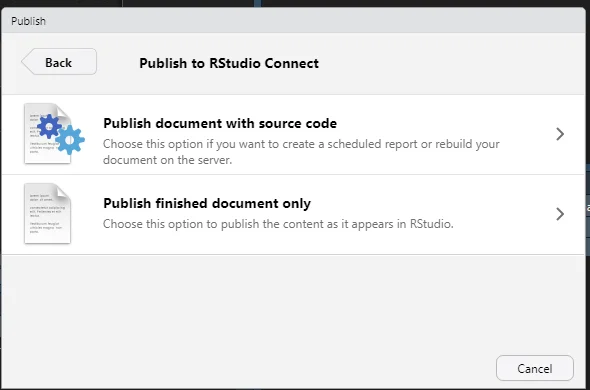
Publish to RStudio Connect
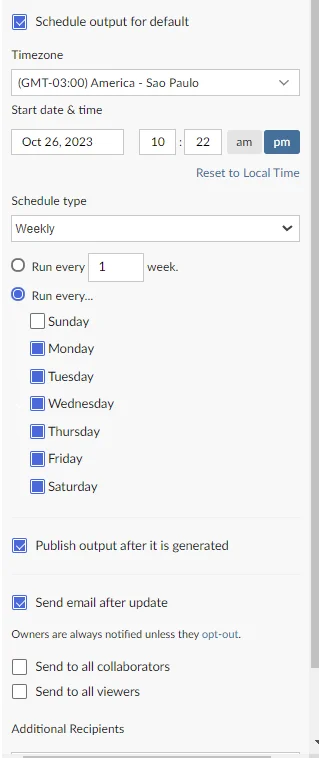
The document can be rendered again on Posit Connect without requiring any adjustment from R/RStudio IDE. It also allows for scheduling the document execution and sending emails.
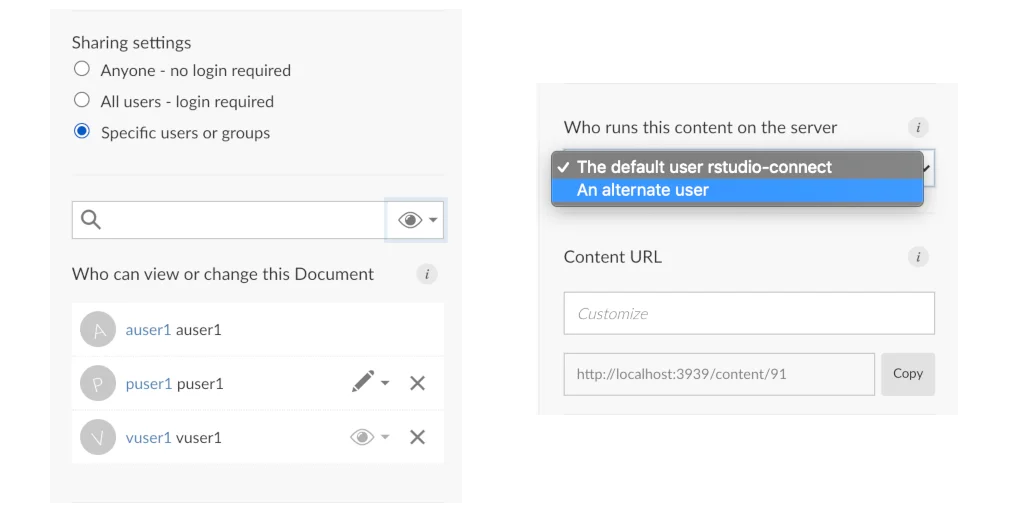
You can also specify the Access:
The same document can be deployed by using the R script:
rsconnect::deployDoc(
    "path/to/file.rmd",
     appName = "simple_doc",
     account = "account_name"
)
Shiny App
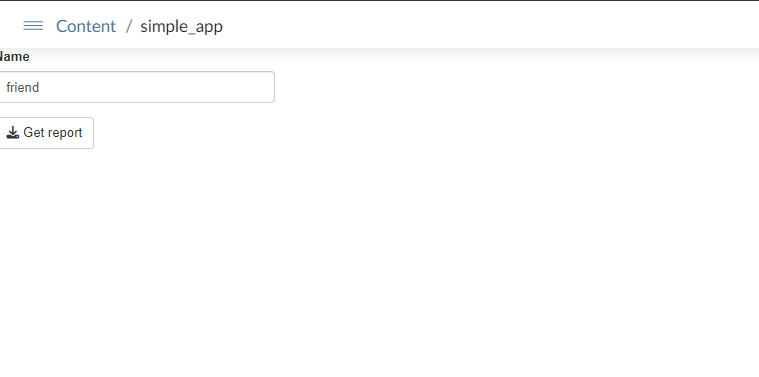
For this example, we’ll use the previous R Markdown code as the file simple_doc.rmd and create a Shiny app that downloads the document report and allows us to change the parameter from the app session.
library(shiny)
library(rmarkdown)

ui = fluidPage(
  textInput("user", "Name"),
  downloadButton("markdown", "Get report")
)

server <- function(input, output, session) {

  output$markdown <- downloadHandler(
    filename = "RMD_report.html",

    content = function(file) {
      params <- list(name = input$user)

      rmarkdown::render(
        "./simple_doc.rmd",
        output_file = file,
        params = params,
        envir = new.env(parent = globalenv())
      )
    }
  )
}

shinyApp(ui, server)
To deploy it on RStudio IDE is similar to the markdown approach:
- Click on
publishbutton andPublish Application….- Remember also to choose the R Markdown file
simple_doc.rmdas part of the published files.
- Remember also to choose the R Markdown file
- Select the shiny app file and publish it to the Posit Connect account.


It can also be deployed using the R script:
rsconnect::deployApp(
  appDir = "path/to/shiny_app/folder",
  appName = "simple_app",
  appFiles = c("app.r","simple_doc.rmd"),
  account = "account_name"
)
Plumber API
For the API, we’ll make a simple code.
#* Hello world back to user
#* @param username The user name
#* @get /echo
function(username = "") {
  paste0("Hello, ", username, "!")
}
To publish in RStudio IDE, we follow the same pattern as before.
To publish in the R script we must run the code:
rsconnect::deployAPI(
    api = "path/to/your/folder_api"
)
We can use the deployed API by:
- Get the URL of the hosted API.
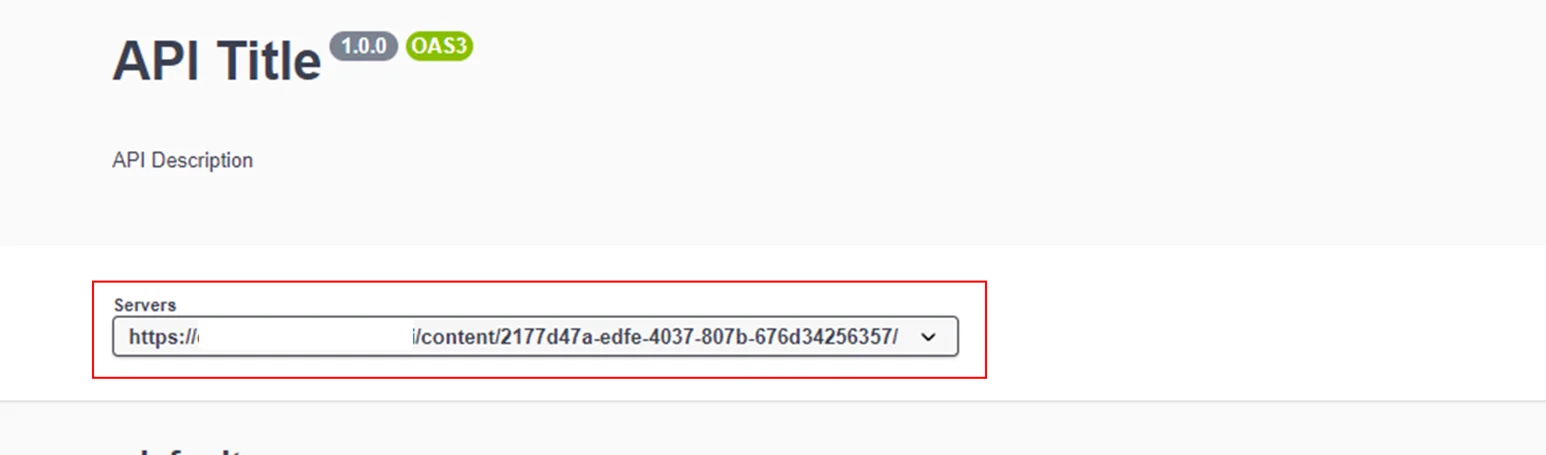
- Run the code with the parameters in the URL.
- Add the Authorization header to connect to Posit Connect server
library(httr)

response <- GET(
  url = "serverurl/echo?username=friend",
  config = add_headers(
    Authorization = paste("Key", Sys.getenv("CONNECT_API_KEY"))
  )
)

content(response)
# [[1]]
# [1] "Hello, friend!"
Ready to transform your Jupyter Notebooks into stunning reports effortlessly? Dive into the world of Quarto and unlock the potential of your data.
Python
Jupyter Notebook
To publish a Jupyter Notebook, all we have to do is click on the publish button and select the Posit connect sever that was set:
To deploy it by the command line (CLI) just write:
rsconnect deploy notebook \
    --server CONNECT_SERVER  \
    --api-key CONNECT_API_KEY \
    your-notebook.ipynb
If you wish to add additional files, just add them after the notebook reference, for further reference check rsconnect-python.
Shiny App
The process of deploying a shiny app (python) is quite similar:
import matplotlib.pyplot as plt
import numpy as np
from shiny import App, render, ui

app_ui = ui.page_fluid(
    ui.layout_sidebar(
        ui.panel_sidebar(
            ui.input_slider("n", "N", 0, 100, 20),
        ),
        ui.panel_main(
            ui.output_plot("histogram"),
        ),
    ),
)

def server(input, output, session):
    @output
    @render.plot(alt="A histogram")
    def histogram():
        np.random.seed(19680801)
        x = 100 + 15 * np.random.randn(437)
        plt.hist(x, input.n(), density=True)

app = App(app_ui, server, debug=True)
To deploy this app, all you have to do is run the rsconnect-python script:
rsconnect deploy shiny -n CONNECT_SERVER path-to-shiny=app/
There are many other applications that can be hosted by rsconnect-python:
api: WSGI-compliant APIs (e.g., bottle, falcon, flask, flask-restx, flasgger, picnic).flask: Flask APIs (Note: flask is an alias of API.).fastapi: ASGI-compliant APIs (e.g, fastapi, quart, sanic, starlette)dash: Python Dash appsstreamlit: Streamlit appsbokeh: Bokeh server apps
Summary
In this blog post, we have shown how to efficiently deploy your applications on Posit Connect using different interfaces, with enough details and references to smooth your process of deploying your own application and collaborating with your colleagues.
Did you find this useful? Learn more and level up your Shiny game. Subscribe to our Shiny Weekly Newsletter for updates, advocacy tips, and cool tutorials from our global Shiny community.
Resources
Contact Us

Head of Sales

Get Updates
Subscribe to Shiny Weekly Newsletter
Join 4000+ Shiny enthusiasts to see the latest Shiny news from the R community.