Imagine you are working on a dashboard, and you want to add this new type of visualization you saw in one of the blogs you follow, or perhaps your users showed you a visualization they liked and asked you to implement something similar.
You roll up your sleeves and start looking through the Shiny components gallery, you check GitHub and PyPi to see if the community already has implemented a library supporting such visualization, but no luck!
Does that mean we won’t be able to implement that feature? Fortunately, thanks to the flexibility of Shiny for Python, we are able to create our own custom JavaScript components!
This means that if there is a JavaScript library with a visualization you would like to use, you can make it usable in Shiny for Python!
In this blog post, we will create a custom component for creating simple flow diagrams based on Drawflow and provide controls for inserting different types of nodes.
Table of Contents
Creating the App
Let’s start by creating a new Shiny for Python application in a directory named drawflow_app.
shiny create -t basic-app -m core
cd drawflow_app
Dive into R Shiny vs. Shiny for Python: What are the Key Differences to uncover the essential distinctions and make your data visualization choice wisely.
Creating Our Custom Component
Now, let’s create a directory that will store the code for our custom component.
mkdir drawflow
We will include there all static files (e.g. JavaScript code and CSS styles) that are necessary to run Drawflow:
curl -Lo drawflow/drawflow.min.css https://unpkg.com/drawflow@0.0.59/dist/drawflow.min.css

curl -Lo drawflow/drawflow.min.js https://unpkg.com/drawflow@0.0.59/dist/drawflow.min.js
Now, we will start writing our glue code, allowing us to use Drawflow in Shiny for Python. We first need to write a bit of JavaScript code and define a custom binding. You can think of a binding as an object that tells Shiny on the browser side how to make use of a given component.
We will write our custom binding in a file called drawflowComponent.js.
touch drawflow/drawflowComponent.js
Now, let’s implement our binding.
Our binding is composed of two methods:
find– it tells Shiny how to locate a given element. Here, we will identify our element by the.shiny-drawflow-outputCSS selectorrenderValue– it tells Shiny how to use the data it got from the server to render a given element. In our case, it allows users to specify if the given drawflow instance should allow users to reroute connections in diagrams. Additionally, we will add a demo node for demonstration purposes.
Last but not least, we need to register our binding so Shiny becomes aware of it.
With the JavaScript part of the way, let’s write the Python wrapping code. First, we need to create our output function:
from htmltools import HTMLDependency
from shiny import App, reactive, ui
from shiny.module import resolve_id

drawflow_dep = HTMLDependency(
    "drawflow",
    "0.0.59",
    source={"subdir": "drawflow"},
    script={"src": "drawflow.min.js"},
    stylesheet={"href": "drawflow.min.css"}
)

drawflow_binding_dep = HTMLDependency(
    "drawflow_binding",
    "0.1.0",
    source={"subdir": "drawflow"},
    script={"src": "drawflowComponent.js"}
)

def output_drawflow(id, height = "800px"):
    return ui.div(
        drawflow_dep,
        drawflow_binding_dep,
        id=resolve_id(id),
        class_="shiny-drawflow-output",
        style=f"height: {height}",
    )
We start off by defining HTML dependencies through the HTMLDependency Function – those are objects holding the static assets that need to be fetched by the browser when using our custom component.
We were not able to find existing documentation for Python htmltools, but you can learn more about how the R/Shiny equivalent works in this documentation.
Next, we define the output_drawflow function, which will include the actual app code. Note that we set the class of the div element to shiny-drawflow-output. This is important as this is the class name that our JavaScript binding we just wrote will be looking for.
Now, we need to create a render decorator for our component:
from dataclasses import dataclass, asdict
from shiny.render.transformer import (
    output_transformer,
    resolve_value_fn,
)


@dataclass
class Drawflow:
    reroute: bool = True


@output_transformer
async def render_drawflow(
    _meta,
    _fn,
):
    res = await resolve_value_fn(_fn)

    return {
        "drawflow": asdict(res)
    }
We first define a dataclass called Drawflow , which will contain the settings for our drawflow instance.
When it comes to our render_drawflow decorator, it will first resolve the result of the decorated function and then prepare the data to be sent to the browser. In our case, we just convert our dataclass into a dictionary so that it can get serialized to JSON.
Now let’s try it out in our app!
from shiny import App, reactive, ui

... # our Python wrapping code

app_ui = ui.page_fluid(
    ui.panel_title("Custom components!"),
    output_drawflow(id="ui_drawflow")
)


def server(input, output, session):

    @output
    @render_drawflow
    def ui_drawflow():
        drawflow = Drawflow(reroute=True)
        return drawflow


app = App(app_ui, server)

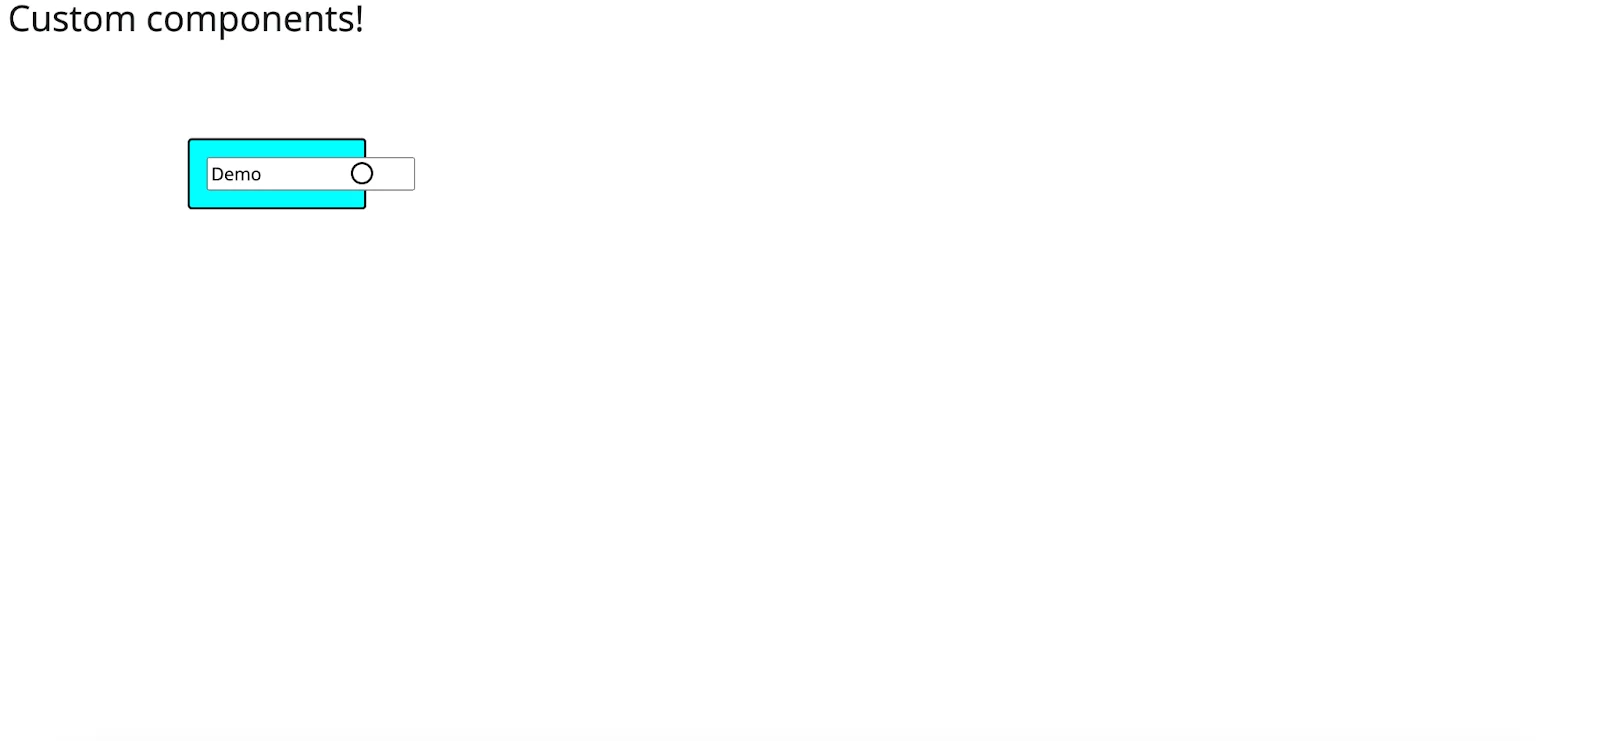
We are now able to see our drawflow component!
But displaying a single block is quite boring isn’t it? Let’s fix that!
Adding More Interactivity
We will add buttons that will insert different types of nodes into our component! To do that, we will add a customMessageHandler (here you can read about the equivalent in R/Shiny).
It’s a function that we will register on the browser side, which we will later be able to invoke from the server side of Shiny!
Let’s add it to our binding file!
With Shiny.addCustomMessageHandler we defined our custom message handler. The first argument corresponds to the id of the custom message handler. We will be using it later on in our server code.
The second argument is the actual JavaScript function that will be run in the browser after invoking it from the server side.
In our case, it’s for adding nodes of different types;
- Start nodes which contain 1 output.
- Intermediate nodes which contain 1 input and 1 output.
- End nodes which contain 1 input.
We also needed to make small adjustments to our original binding:
- We removed the demo node.
- We store the created editor object in a global map object – this allows us then to refer to it in our
customMessageHandler.
Let’s use it in our app!
from shiny import App, reactive, ui, session

... # our Python wrapping code

async def add_node(id, node_type):
    current_session = session.get_current_session()
    await current_session.send_custom_message(
        type="add_node",
        message={
            "id": id,
            "type": node_type
        }
    )


app_ui = ui.page_fluid(
    ui.panel_title("Custom components!"),
    ui.input_action_button(id="add_start_block", label = "Add start block"),
    ui.input_action_button(id="add_intermediate_block", label = "Add intermediate block"),
    ui.input_action_button(id="add_end_block", label = "Add end block"),
    output_drawflow(id="ui_drawflow")
)


def server(input, output, session):
    @reactive.Effect
    @reactive.event(input.add_start_block)
    async def _():
        await add_node(id="ui_drawflow", node_type="start")

    @reactive.Effect
    @reactive.event(input.add_intermediate_block)
    async def _():
        await add_node(id="ui_drawflow", node_type="intermediate")

    @reactive.Effect
    @reactive.event(input.add_end_block)
    async def _():
        await add_node(id="ui_drawflow", node_type="end")

    @output
    @render_drawflow
    def ui_drawflow():
        drawflow = Drawflow(reroute=True)
        return drawflow


app = App(app_ui, server)
To invoke the custom message handler from the server, we run the session.send_custom_message function with the id of our customMessageHandler along with the data to send to the browser – in our case the id of the element and the type of the node we want to add.
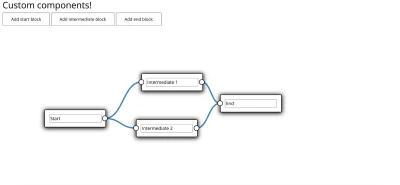
Let’s see the app in action!
All right, now we have some interactivity, but we could still use some work on the styling of the blocks to make them look better. We will use the default theme generated by the drawflow-theme-generator and save it in drawflow/drawflowComponent.css.
We need to add it to our html dependency to make it work.
drawflow_binding_dep = HTMLDependency(
    "drawflow_binding",
    "0.1.0",
    source={"subdir": "drawflow"},
    script={"src": "drawflowComponent.js"},
    stylesheet={"href": "drawflowComponent.css"}
)
Now, it looks much cleaner!
Summary
We created our own custom component, and now we are able to use drawflow in our Shiny for Python application.
This shows the great flexibility of Shiny for Python, which allows us to leverage existing JavaScript libraries and make use of them in our apps.
The full source code used in the blog post is available on GitHub.
Based on this Pull Request, it looks like the Shiny team is working on other features, such as wrapping Web Components or React components, so stay tuned!
On top of that, both the shiny-bindings-core and shiny-bindings-react could potentially be used with R/Shiny as well. This means that we might:
- Be able to include Web Components in our R/Shiny apps.
- Gain a new way of using React components in R/Shiny (alongside the existing reactR and shiny.react packages).
This is great news, as it could further enhance the extensibility of R/Shiny! We will be keeping an eye out on shiny-bindings and see how it evolves.
Did you find this article insightful and helpful? If so, we invite you to become a part of our vibrant community at Shiny 4 All. Join us today to connect with fellow Shiny enthusiasts, share insights, and continue exploring the world of Shiny.


