Share
Share Tweet
Tweet Share
Share


RStudio Cloud is a hosted version of the well-known R programming IDE – RStudio. It was created to simplify teaching and learning R programming languages for organizations, professionals, teachers, trainers, students, and hobbyists. But how can you get started, and why should you? That’s what we’ll answer today.
Note: At the time of writing this article, Posit PBC was RStudio PBC. RStudio services and products mentioned in the article below do not reflect the rebranding.
After reading, you’ll know why you should move R and RStudio to the cloud, how to get started, create and share your first project, and also how to work with R Markdown. So without much ado, let’s dive straight in!
Are you a beginner RStudio user? Here’s our curated list of shortcuts and tips.
Table of contents:
- Why Move R and RStudio to the Cloud?
- RStudio Cloud – Getting Started
- How to Create a New Project in RStudio Cloud
- How to Upload and Work With Data in RStudio Cloud
- R Markdown in RStudio Cloud
- How to Share Your RStudio Cloud Workspace
- Conclusion
Why Move R and RStudio to the Cloud?
Think of RStudio Cloud as a managed cloud instance of the RStudio IDE. But it’s not just a piece of software – it also enables computing. Here’s the list of features we find worth mentioning:
- Learning R easily – RStudio Cloud comes with a couple of interactive learning materials that will get you started with the fundamentals of data science in R.
- No installation required – Run code straight from the browser – no need to download, install, and configure R and RStudio locally.
- Reproducible environment – How many hours have you spent installing libraries and managing environments? In RStudio Cloud, each project has its own environment that is reproducible when anyone accesses the project.
- Collaboration – You can easily share your insights with teammates in a private space.
These alone are four excellent reasons why you should consider moving R and RStudio to the cloud. But before we show you how, let’s address the elephant in the room – pricing.
RStudio Cloud Pricing
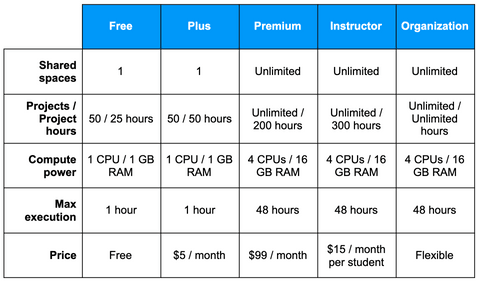
Here is the good news – you can get started with RStudio Cloud for free. The only “gotcha” is that you have limited projects, project hours, and computing power. The table below summarizes the differences between RStudio Cloud pricing plans as of January 2022:
Image 1 – RStudio Cloud plan options
As always, both the offerings and price of individual plans can change, so we recommend you check the official listing.
We advise you to get started for free and scale if you need additional hours or compute power.
And that about summarizes the pros and cons. Yes, you get access to a familiar interface that requires no installation and makes collaboration a breeze, but you’ll likely have to pay for it. If you’re an organization, 25 project hours and a single shared space won’t be enough.
If the pros outweigh the cons, make sure to read the next section to see how to get started with RStudio Cloud.
RStudio Cloud – Getting Started
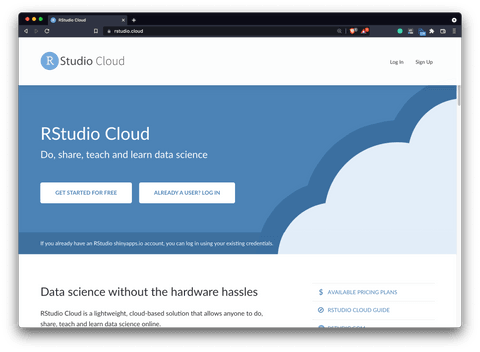
You’ll have to register for a free account to get started with RSudio Cloud. Head over to their website – here’s what you should see:
Image 2 – RStudio Cloud website
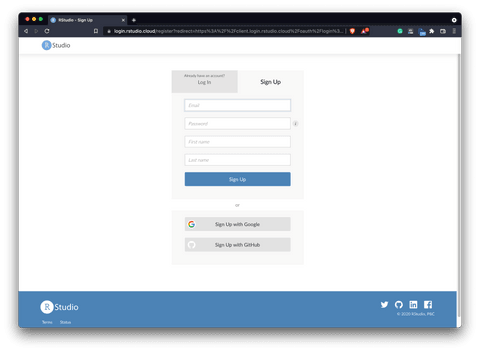
Click on the Sign Up button in the top right corner and the following form will pop up:
Image 3 – RStudio Cloud sign up form
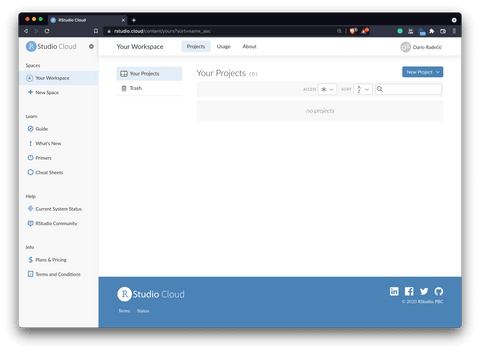
By far the fastest and easiest registration method is by using your Google or GitHub credentials. We opted for Google sign-up, and it took two clicks. Once done, you’ll be presented with the RStudio Cloud dashboard:
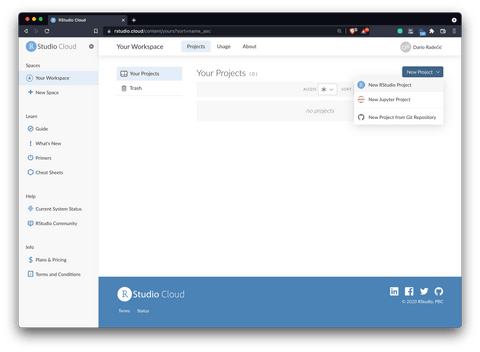
Image 4 – RStudio Cloud dashboard
How to Create a New Project in RStudio Cloud
Once in the dashboard, you can click on the New Project – New RStudio Project to get started:
Image 5 – Creating a new project in RStudio Cloud
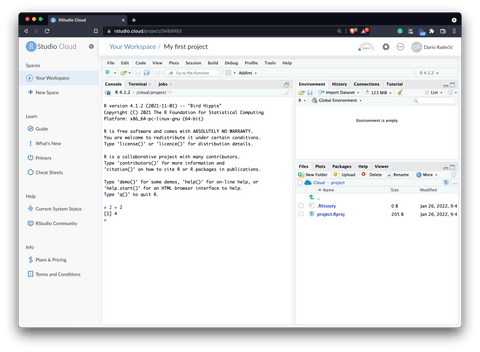
You’ll have to wait 30-60 seconds until the new project is provisioned. Once done, you’ll see a well-familiar RStudio interface:
Image 6 – RStudio Cloud interface
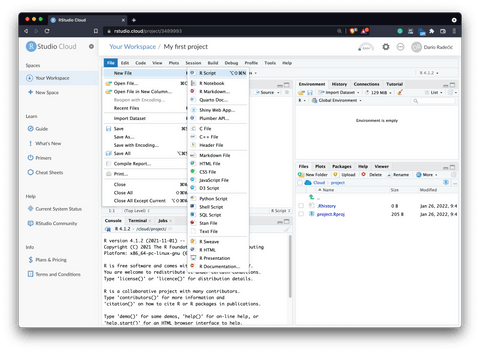
The whole cloud IDE works just as you would expect. You can create a new R script by going to File – New File – R Script as shown below:
Image 7 – Creating a new R script
We’ll see you in the next section where we’ll upload and explore some data.
How to Upload and Work With Data in RStudio Cloud
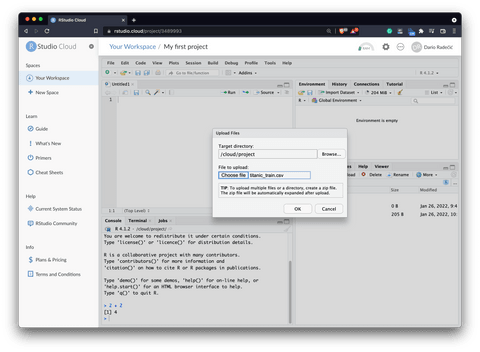
Uploading a dataset to RStudio Cloud is as simple as clicking on the Upload button in the Files tab (bottom right quadrant). Once there, click on Choose file and specify the path to your dataset. For demonstration purposes, we’re using the training subset of the Titanic dataset:
Image 8 – Uploading a dataset to RStudio Cloud
Once the dataset is uploaded to the cloud, you can load it into the R environment. There are two approaches:
- Import dataset functionality – Click on the Import Dataset button under Environment in the top right quadrant.
- R’s CSV reader – Use a dedicated R package to load CSV files.
We’ll opt for the first option today. Here’s what you should see:
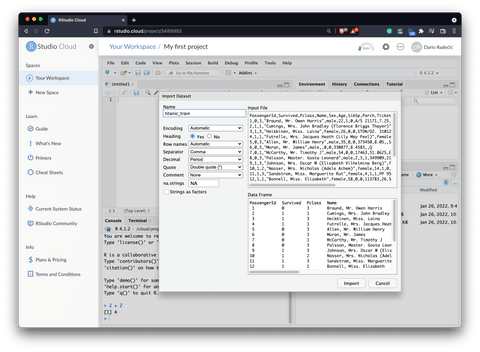
Image 9 – Loading a dataset into the R environment
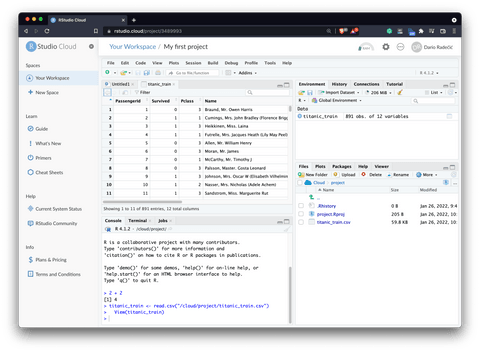
Once you click on Import, you’ll have the dataset ready to use in your RStudio Cloud environment:
Image 10 – Dataset successfully imported to RStudio Cloud
But what now? Well, we have to install a couple of R packages before we can work with it. To keep things simple, we’ll only install dplyr and ggplot2. Run the following commands from the R console:
Image 11 – Installing dplyr and ggplot2 R packages
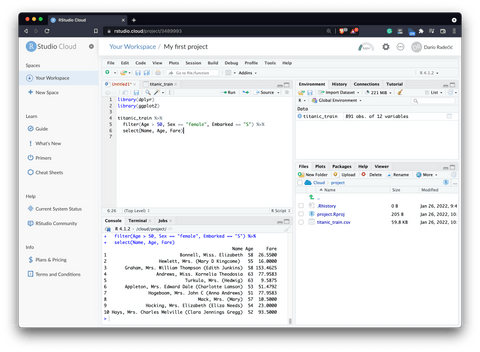
And now let’s import and use the packages. The following code snippet imports both dplyr and ggplot2 and prints three columns for female passengers over the age of 50 embarked in Southampton:
Image 12 – Data manipulation with dplyr
New to dplyr? Get up to speed with our dpylr tutorial.
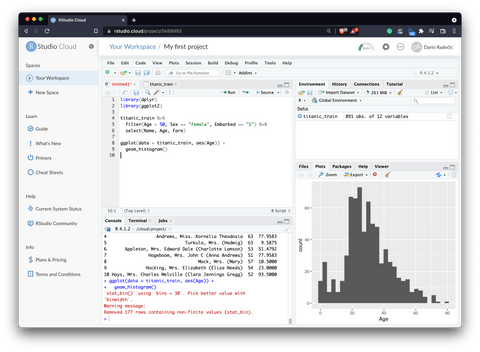
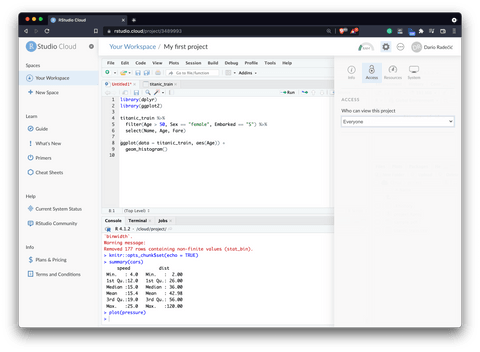
It works just in your regular RStudio desktop IDE. Onto the visualization now. We’ll use ggplot2 to draw a histogram of the Age column:
Image 13 – Data visualization with ggplot2
Want to learn more about histograms with ggplot2? We have a complete ggplot2 guide you can follow.
Long story short – there’s no functionality limitation in RStudio Cloud. You can do anything you would normally do in the desktop or server versions.
R Markdown in RStudio Cloud
R Markdown allows you to create reproducible documents around your data analysis which you can then export as HTML, PDF, or Word files. Think of it as a notebook – your text, code, and code output are presented visually in an easy-to-follow format.
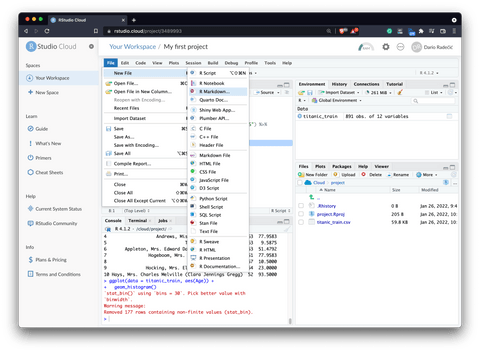
To get started, click on File – New File – R Markdown (It might ask you to install missing packages on the first run):
Image 14 – Creating a new R Markdown file in RStudio Cloud
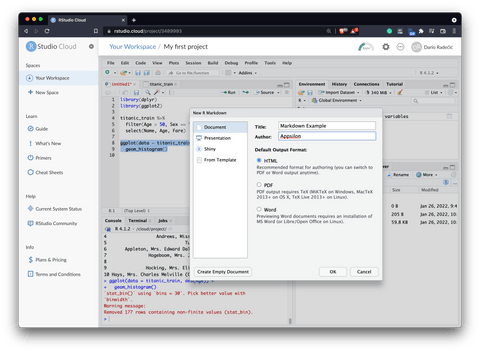
A modal window will pop up asking you to provide a title, author, and a default output format for your markdown document:
Image 15 – R Markdown document details
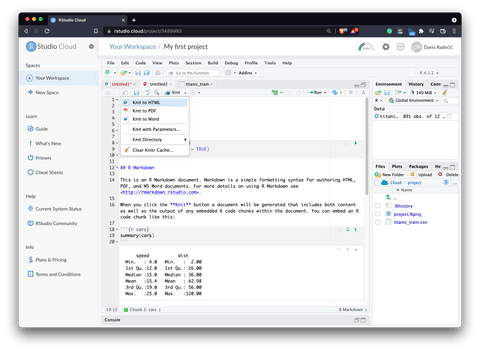
Once you click on OK, you’ll have access to the R Markdown file. We won’t do anything to modify it today, but we will show you how to export it. Click on the Knit icon and choose the output format. We’ll go with PDF today:
Image 16 – Exporting R Markdown files
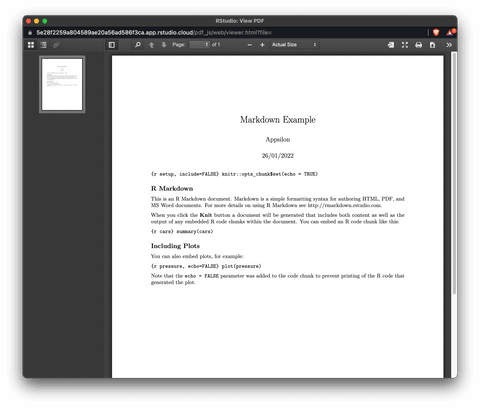
You’ll see a new PDF file in your Files menu after a couple of seconds. It will also open the document automatically. Here’s what it looks like:
Image 17 – Exported R Markdown PDF
Nothing to write home about, but just enough to get you started. You now know how to work with R scripts and R Markdown files in RStudio Cloud. The only thing left to discuss is workspace sharing, so let’s cover that next.
How to Share Your RStudio Cloud Workspace
The biggest selling point of RStudio Cloud is the ease of collaboration. Multiple users or coworkers can work on the same project easily in the cloud. The collaboration option isn’t enabled by default, so you’ll have to change a couple of things.
First, click on the settings icon in the top right corner. Then go under Access, and change the access type to Everyone:
Image 18 – Changing access type
That takes care of the permissions. The next step is to send an invite to the users. To do so, click on the icon next to the settings icon, and select the Share Project Link option:
Image 19 – Sharing the project link
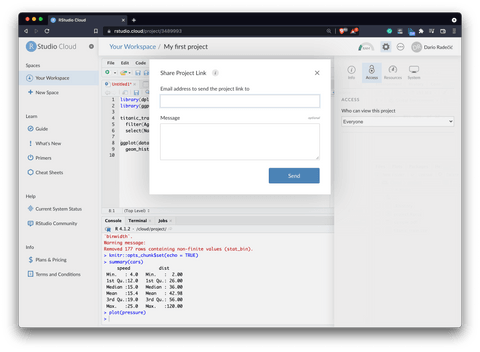
A new modal window will pop up. From here, you can enter an email of the person you want to collaborate with and an optional message. We won’t invite anyone today, but this is how you can do it.
Image 20 – Inviting collaborators to an RStudio Cloud project
That was easy, wasn’t it? You now know everything you need to get started with RStudio Cloud. We covered a lot of ground today, so here’s a short recap.
Conclusion
To summarize, if you and your team need to work on the same R project, RStudio Cloud could save you a lot of time. It’s a fully-hosted solution designed with collaboration and reproducibility in mind. There are also many tutorials on learning R in RStudio Cloud, so beginners can get started without setting up the environment locally.
It’s an amazing deal, even for the free tier. Sure, you’re limited to 1 GB of RAM and 25 hours of project time, but that shouldn’t be a problem if you’re just starting out. You can always scale from there, starting at just $5 per month.
What are your thoughts on RStudio Cloud? Have you or your organization migrated to the cloud? What was the primary reason? Please let us know in the comment section below or on Twitter – @appsilon.
Contact Us
Project Manager

Get Updates
Subscribe to Shiny Weekly Newsletter
Join 4000+ Shiny enthusiasts to see the latest Shiny news from the R community.