Share
Share Tweet
Tweet Share
Share
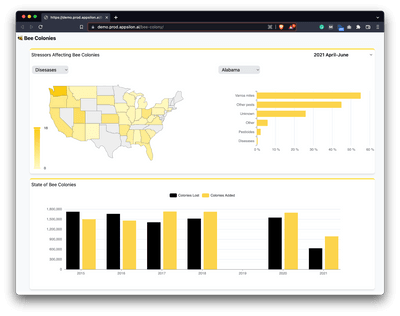


At Appsilon we believe that a good-looking, well-designed interface is the key to making your Shiny Dashboard a success. TailwindCSS is a utility-first CSS framework created by one of the authors of Refactoring UI. As I really enjoyed the book, I decided to give it a shot and try using TailwindCSS in Shiny. The result of that is the Bee Colony Losses dashboard.
Today you’ll learn how to quickly configure TailwindCSS and how it can help you in building better-looking user interfaces in your Shiny dashboards.
Is your Shiny UX design missing something? Follow these 7 steps to design Shiny dashboards.
Table of Contents:
TailwindCSS Configuration for Shiny
Tailwind provides a Play CDN script, which allows you to use Tailwind right in your browser – that means no build steps, and no need to install any additional tools such as nodejs. To use it in Shiny, you just need to include the script in your UI definition:
library(shiny)

ui <- div(
  tags$script(src = "https://cdn.tailwindcss.com")
)

server <- function(input, output, session) {

}

shinyApp(ui, server)
That’s it! Now we can start using TailwindCSS classes to prototype the UI of our dashboard. Keep in mind that the Play CDN script is not recommended for production usage, but in the case of prototyping, it is a good way to quickly get started.
Need a Shiny UI/UX for an enterprise app? Learn how to build Shiny UIs with Appsilon’s UI/UX coding tutorial.
Using TailwindCSS in Shiny
TailwindCSS differs from other CSS frameworks that you might know e.g. Bootstrap or Fomantic UI. You do not have specific classes for UI components such as buttons or forms. What TailwindCSS offers is a set of utility classes that you combine to create your own designs. This means that two applications built with TailwindCSS are probably not going to look similar (see their Build Anything section on their website). Ultimately, it allows you to avoid having a typical Bootstrap look and stand out from other apps in terms of design.
Is your R project looking bland? Learn how to leverage CSS to style your Shiny app.
Example use of TailwindCSS in Shiny
Let’s assume that you want to make one of your UI components have rounded corners. Instead of defining your own class specifying the border-radius property, you can just apply the rounded utility class from TailwindCSS. Let’s see it in action with Shiny!
library(shiny)

ui <- div(
  tags$script(src = "https://cdn.tailwindcss.com"),
  div(
    "I am a rounded box!",
    class = "rounded bg-gray-300 w-64 p-2.5 m-2.5"
  )
)

server <- function(input, output, session) {

}

shinyApp(ui, server)
As you can see by applying a couple of TailwindCSS classes, we were able to quickly define a component with rounded borders, a background color, a fixed width as well as padding and margins.
Advantages of using TailwindCSS in Shiny
I know this approach to styling UI might seem weird, but it has its advantages. The utility classes provide you with good defaults – for example, the box shadow utility offsets your shadows by default, which makes shadows look more natural (see article).
Moreover, TailwindCSS comes with predefined scales, so if you want to add a larger shadow instead of using the shadow-md class, you can use larger equivalents e.g. shadow-lg, shadow-2xl. This narrows down your choices and prevents you from agonizing whether a shadow looks better with a 1px or 2px offset and as a result allows you to design faster. By using a predefined scale, you make your UI more consistent and follow the Law of Similarity.
Looking for Microsoft’s Fluent UI in Shiny? Appsilon’s open source shiny.fluent makes it easy to build professional, modern apps.
Downside of using TailwindCSS in Shiny
The downside of using TailwindCSS in Shiny is that you might have trouble using base Shiny components such as selectInput and textInput. You might need to reimplement some of the JavaScript-based logic to set up the communication between your custom styled inputs and Shiny.
TailwindCSS in Shiny – Summary
You only need one line of code to start playing around with TailwindCSS in your Shiny applications. TailwindCSS provides predefined systems, scales, and good defaults that allow you to quickly design a good-looking and consistent UI.
Is your Shiny dashboard ugly? Watch Appsilon’s crash course in Shiny UI.
By using TailwindCSS you can build a Shiny app that does not look like your typical Shiny app. At the same time, you need to be careful as some of the things that work in base Shiny might not work when combined with TailwindCSS. This means it might require you to reimplement some of the features that are already available in base Shiny.
Tell us how you’re using TailwindCSS in your Shiny apps in the comments below, or share your project with us on Twitter.

Get Updates
Subscribe to Shiny Weekly Newsletter
Join 4000+ Shiny enthusiasts to see the latest Shiny news from the R community.